


This is part II of our Raspberry PI Google AIY Voice Kit project. You can read part I here. We received our Google AIY Voice Kit from Amazon.ca the other day. The kit contains the following:
- Voice Hat + to "standoffs" to mount the voice hat to the board
- Stereo microphone daughterboard
- Button
- Speaker
- Connections for the daughterboard, speaker and button
- Inner cardboard case
- Outer cardboard case
- The Magpie Essentials instruction manual
The kit we purchased doesn't include:
- A Raspberry PI
- Micro SD card
- Power supply
- Keyboard
- Mouse
- Monitor + HDMI cable
- Small Phillips screwdriver
- Scotch tape
Step One
The first step is to insert the two standoffs into the corresponding holes on your Raspberry Pi. The standoffs are just small plastic legs that help support the voice hat once it has been mount into the GPIO pins on the Raspberry PI (see image above). The standoffs just pop into the Raspberry PI and then line up with corresponding holes on the voice hat when you align it with GPIO pins.
Step Two
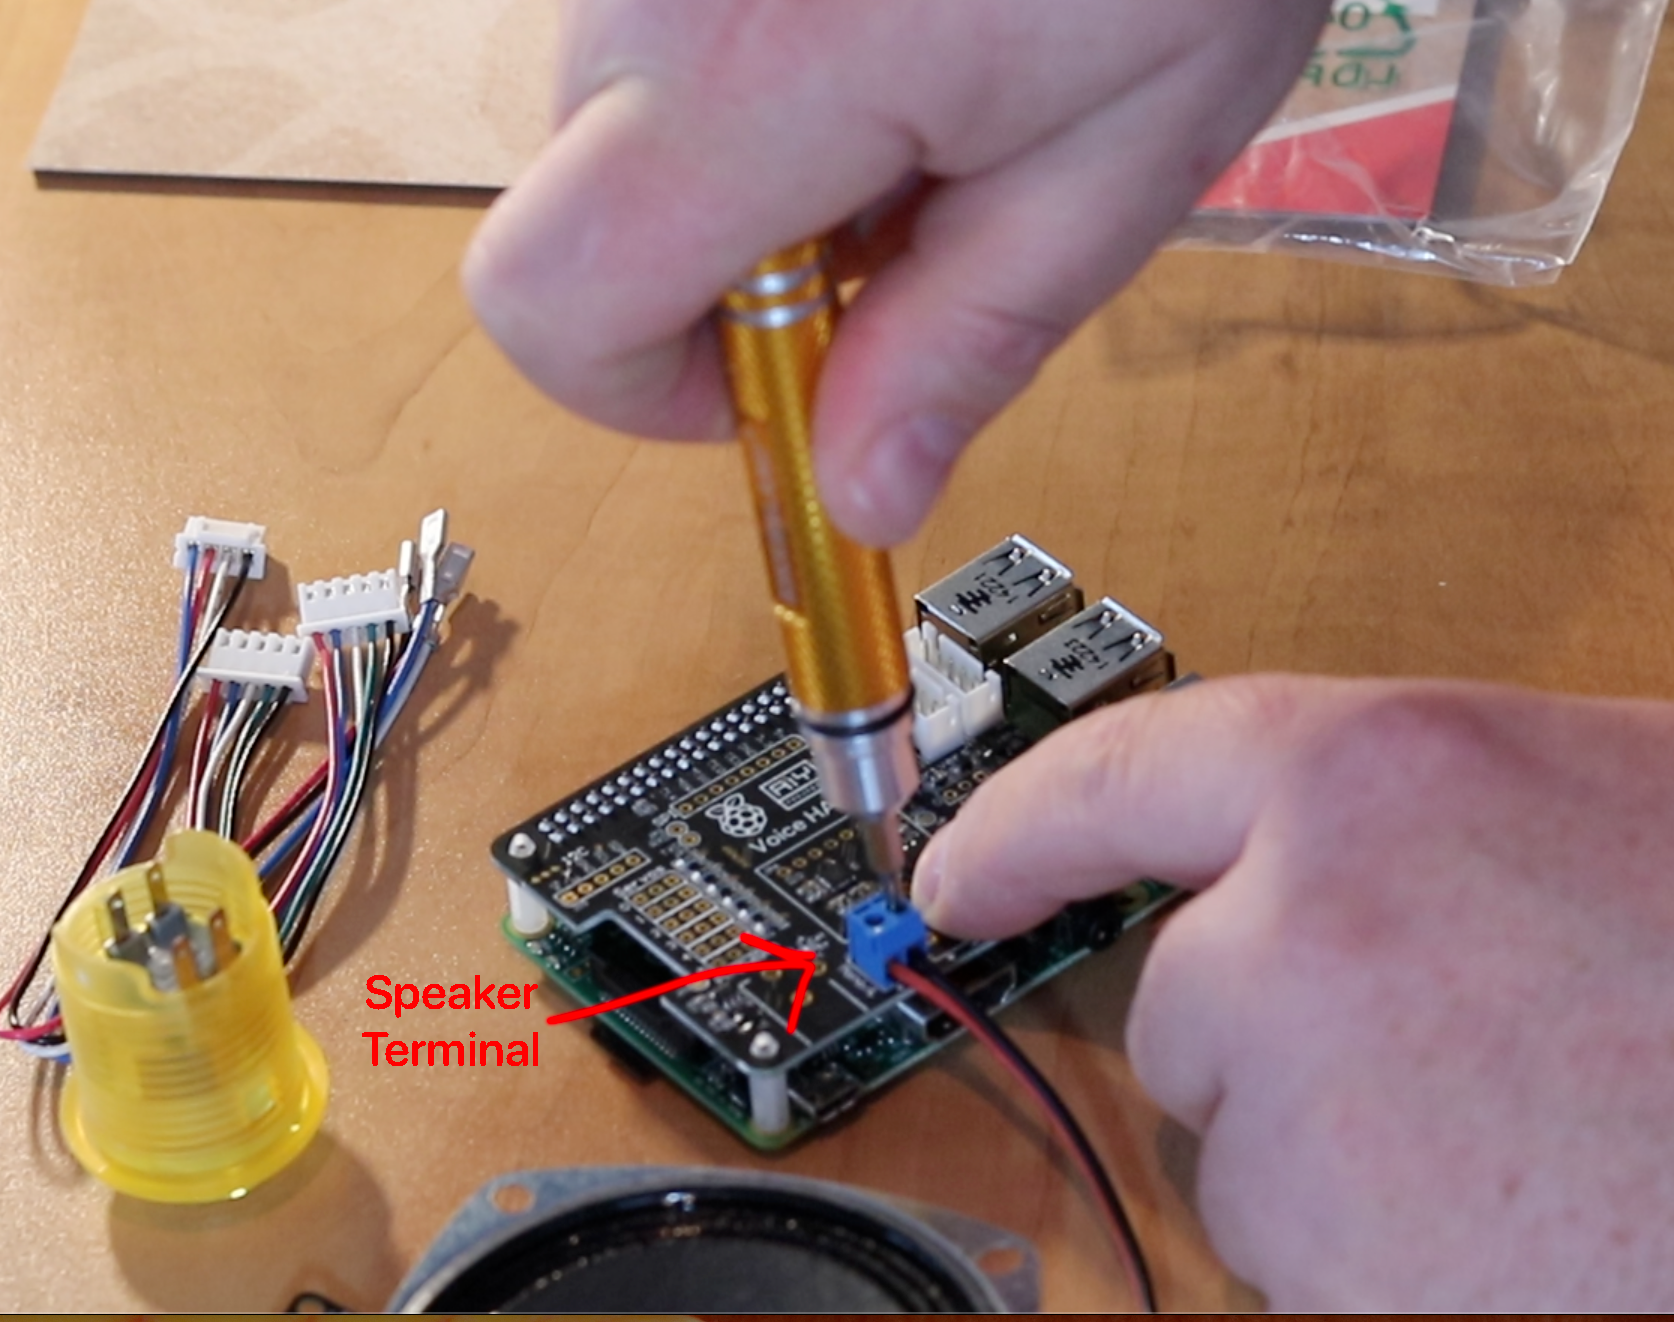
The next step is to attach the two speaker wires to the voice hat. You will see a blue terminal that has a positive and negative sides. The blue terminal is labelled "speaker" on the voice hat. The red wire goes to the "+" side and the black wire goes to the "-" side. This where you will use the small Phillips screwdriver to tighten down the screws on each side of the terminal to secure the wires.
Step Three
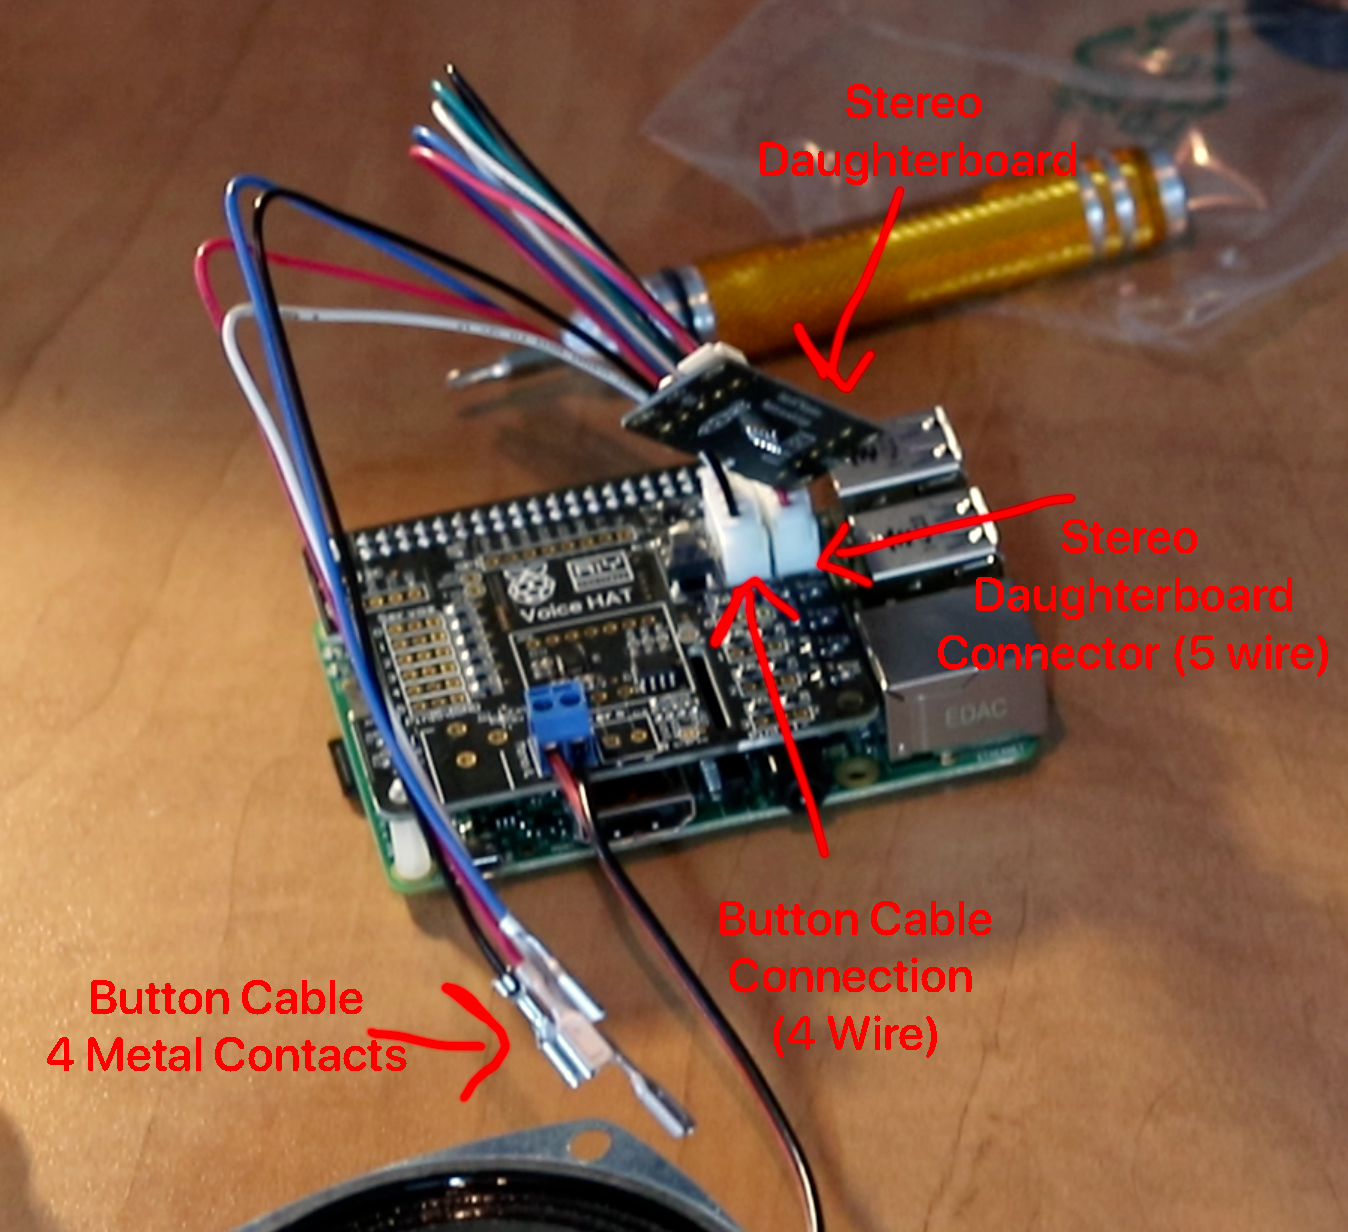
Attached the "button" cable. The button cable has a white connector on one end and has four contacts on the other end. Be sure to line the grooves with ridges on the back of the connector and make sure the pins line up.
Step Five
Attached the stereo mic daughterboard cable, which has two 5 wire white connectors. Both ends are identical. One connector connects to the voice hat and the other side connects to the stereo mic daughterboard.
Step Six
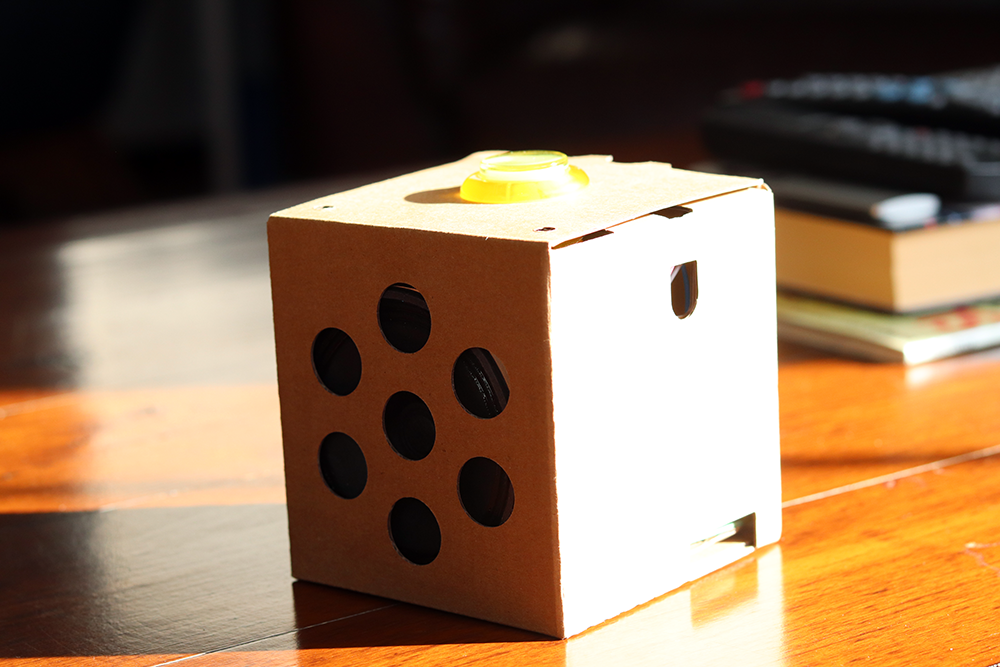
Step six was the most difficult step for me. This is where you fold the cardboard. The outside cardboard shell came together quite easily. You just had to fold the four flaps on the bottom to form the cube shape. This is your finished case for your project. The hard part (for me) was the inside cardboard sleeve. It houses the assembled Raspberry Pi with the voice hat, speaker and stereo microphone daughterboard. For some reason, it was bafflingly me as to how to get it to fold properly. Honestly, it took me maybe 7-8 mins to assemble everything prior to this step and probably double that time to get the inner sleeve folded. Once I had it folded the Raspberry Pi assembly with speaker all slid into the outer cardboard shell.
Step Seven
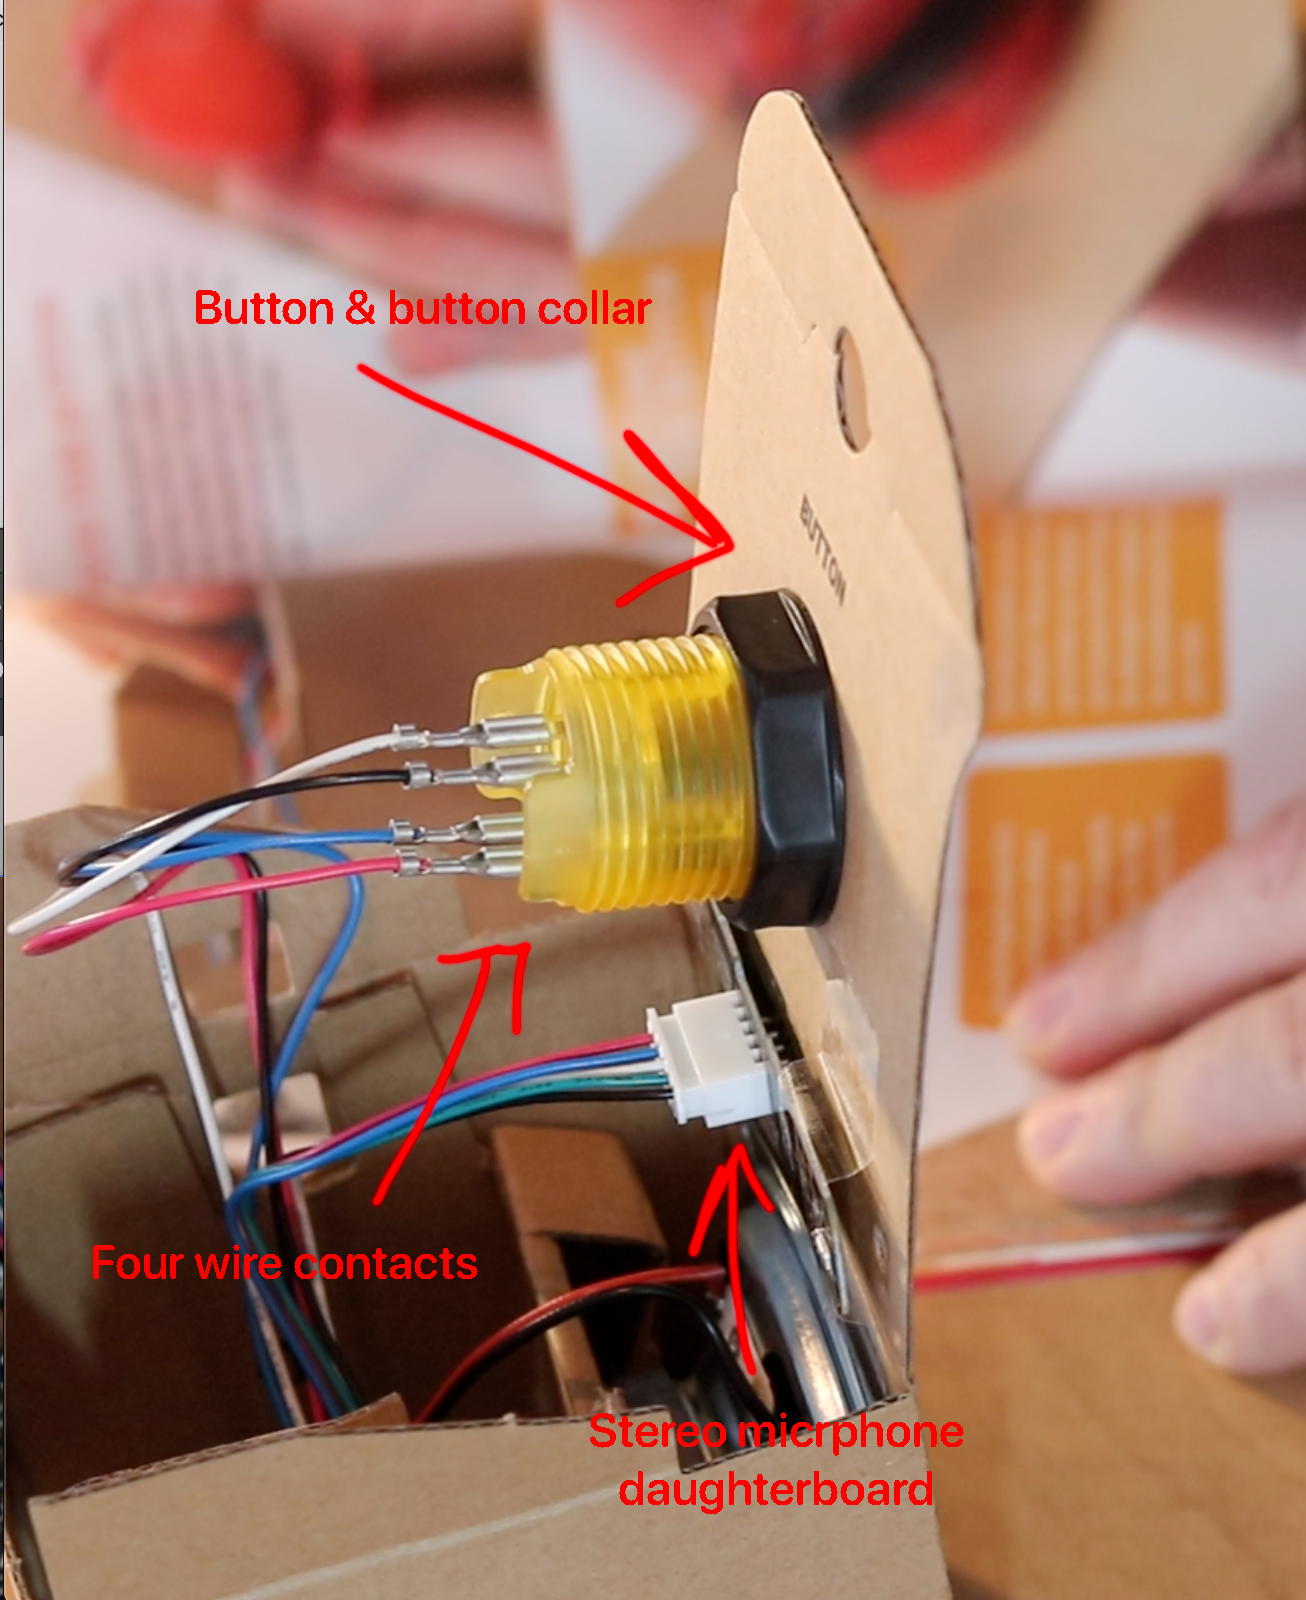
Once you have everything sitting properly in the cardboard sleeves you need to connect the button to the cardboard case. The punch-out is labelled "button" and the button slides in and the plastic collar screws on from the bottom to hold it in place. The four metal contacts are attached to the bottom of the button. The trick is to find the "crown" printed on the bottom of the button and match the coloured wires up in the same order that is outlined in the Magpie instruction manual.
Step Eight
Finally, you want to use some scotch tape and tape the stereo microphone daughterboard to the bottom of the top cardboard outer shell flap. You will see it has two small holes labelled "mic" that you use to align the small black mics on either side of the daughterboard. After the daughterboard is scotch-taped into place you can go ahead and close the top flap.
Once you are done closing up the top flap you now have completed the hardware portion of this project. The shell has callouts for all your Raspberry Pi ports to allow you to hook up your monitor, mouse, keyboard, etc. In the next blog we will tackle the software side of this project.
Have a suggestion for a topic you would like to see covered on LearnTechGuy.com? Visit our make a suggestion page and we will do our best to honour your request!
Disclaimer: All the opinions are my own and are not the views of any suppliers or manufacturers.